
Can anyone name the trademark sign that a little girl is from the South (or has a mom from the South)?
A really big bow. You know down here we take the proportion thing to extremes. The bow should be at least half the size of the child's head to meet Southern requirements (although bitty bows are totally acceptable from time to time).
For years I have been shelling out a decent amount of money for bows only to have Belle lose it at school, drop them out of the stroller when she was younger, or the best...take them apart. I finally decided it was time I saved a pretty penny and made my own bows for Belle. I was shocked at how many wonderful tutorials and videos there are out there. I might slap myself if I walk into another store to buy a bow!
Boutique Bow Tutorial

Ribbon: I prefer 1.5" width but you can achieve many different results using differing widths and lengths of ribbon. This tutorial uses 22" of length but I love using 32" as well.
Lighter
Large Salon Clip: found at Sally Beauty Supply
Hair Clip: found at Hobby Lobby
Accent Ribbon
Needle and Thread
Embroidery Floss
Marking Tool: pencil for light ribbons and dark marker for dark ribbons.


Slide the salon clip over the middle to hold the loops in place.

Look at the bow from the front and back and adjust loops as necessary.
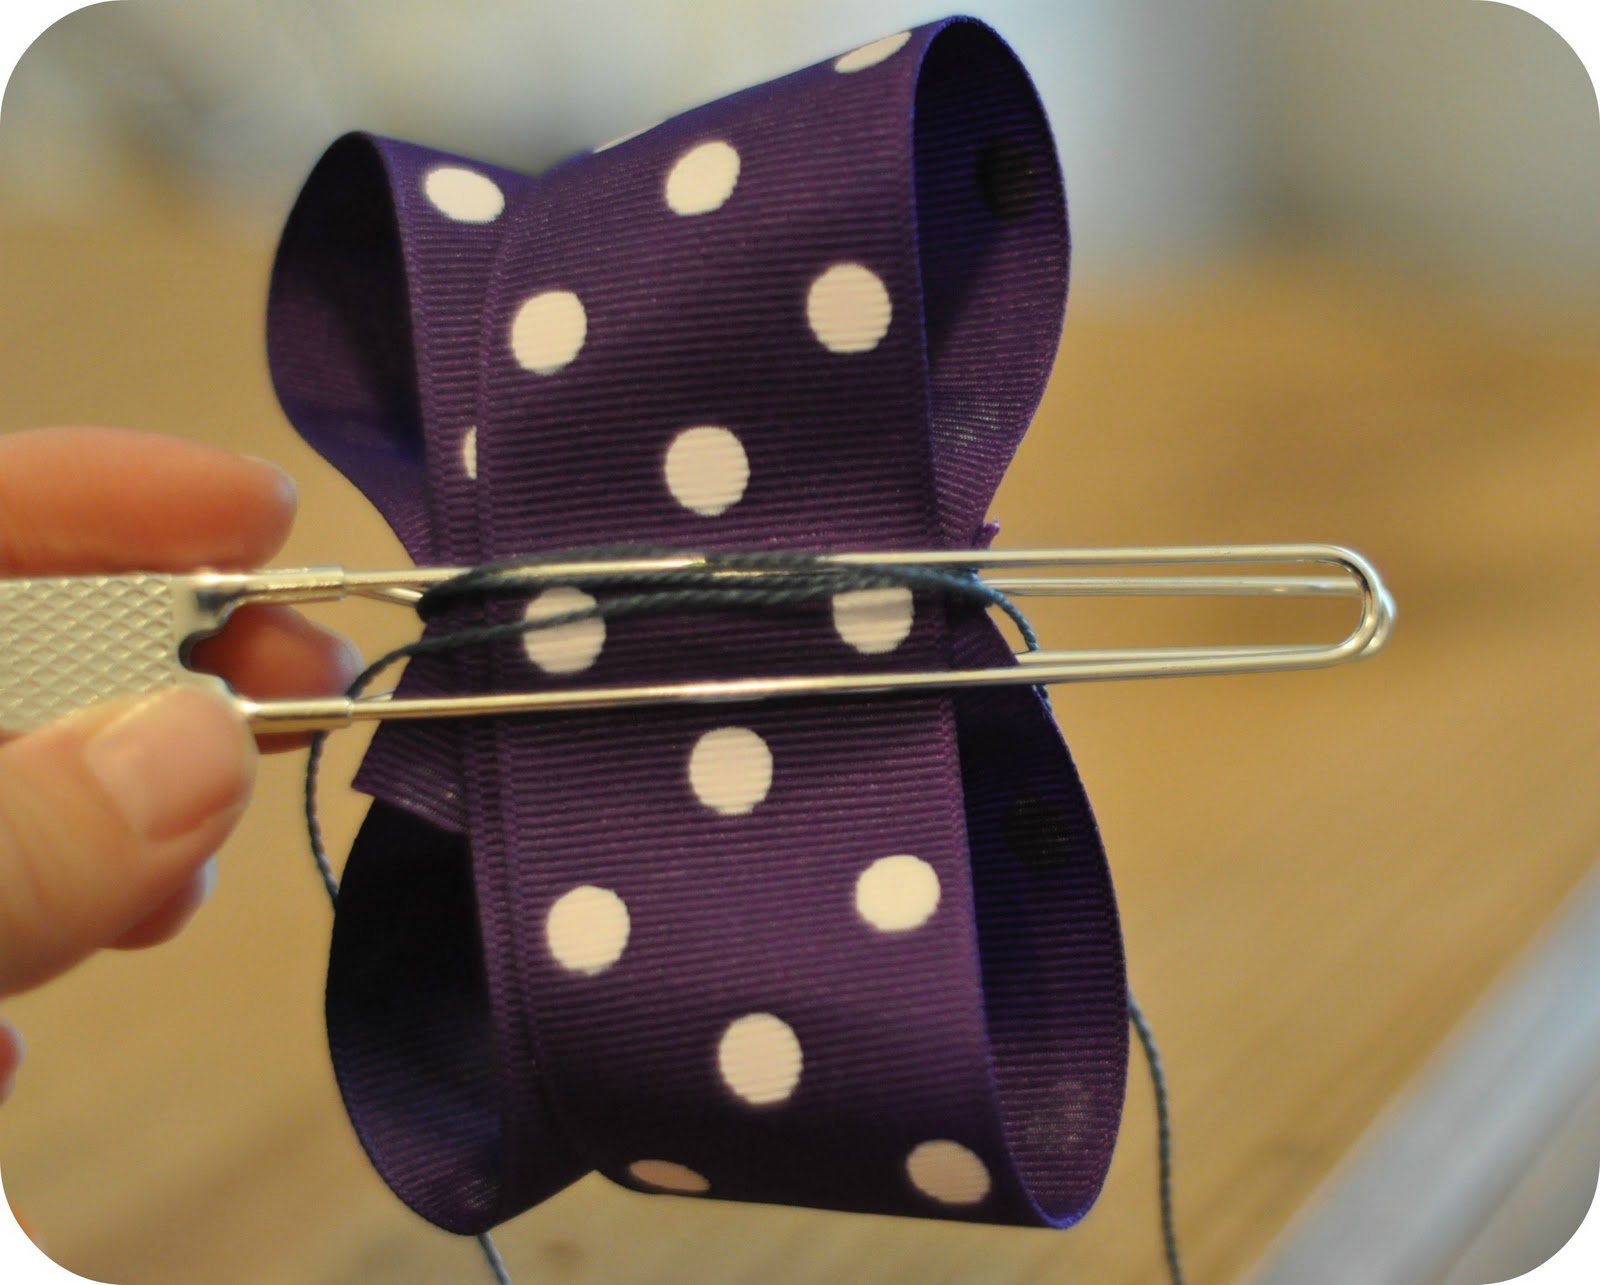
Use your embroidery floss and thread around the bow twice.

Pull tails of embroidery floss gently to bring the creases of the bow together. Tie tightly in a knot.

Using your needle and thread, thread your needle and tie the ends of the thread in a knot. Bring the needle straight through the center of the bow. This will take some force. I often use my table to push the needle through.

Loop the thread around tightly a few times and come through the center again. Tie off your thread and trim your thread ends closely to the knots.

Prepare your accent ribbon. You can use your main ribbon folded horizontally twice. I like to use 1/4" ribbon, double it over and tie in a loose knot. Attach one end of accent ribbon to back of the bow using a dot of hot glue.

Bring the other end of your accent ribbon around and trim the ends to fit the bow. Attach the end with another dab of hot glue.

Attach your hair clip to the bow using hot glue. If your hair clip has open prongs, make sure to place a piece of folded wax paper between the clip to prevent sticking. Many bows have the hair clip attach to the accent ribbon, but I have found with my daughter that this alters the quality of the bow's ability to stay in her hair.

There you have it! A precious (maybe not perfect) boutique hair bow all ready for the National Championship game this weekend...I mean LSU vs Alabama.
GEAUX TIGERS!
Next bow tutorial...The Pinwheel Bow
You saved the day!
ReplyDelete