
Bow Tie Bows are super cute in their simplicity but the options are endless for fun colors and prints. I think of all the bows, they are the easiest and quickest to make. While this is not my favorite tutorial to give you guys because I was rushed, I loved the ease of making these bows.

Supplies Needed:
Ribbon of your choice. Determine length needed: desired size of finished bow x 2 plus 1 inch.
(For example: I wanted a 4-inch finished bow so I used 9 inches of ribbon)
Hair salon clip
Needle and thread
Lighter
Hair clip
Hot glue gun (not pictured)

Begin by finishing the ends of your ribbon using a lighter or other heat sealing device to prevent your ribbon from fraying.

Fold ribbon in half and use your finger nail or other edge to crease the half way point.

Double ends of ribbon over a half inch to create loop as shown. (I brought the bottom edge out a little just so you could see they are double over)

Bring the half way mark up to your doubled edges as shown.

Slide hair salon clip in to hold in place.

Thread your needle and tie a knot at the ends. Bring your needle through the center of your ribbon in the center of the hair clip. Pull through and trim your ends under the knot in your thread.

Loop the thread around the ribbon through the openings in the hair clip a few times.
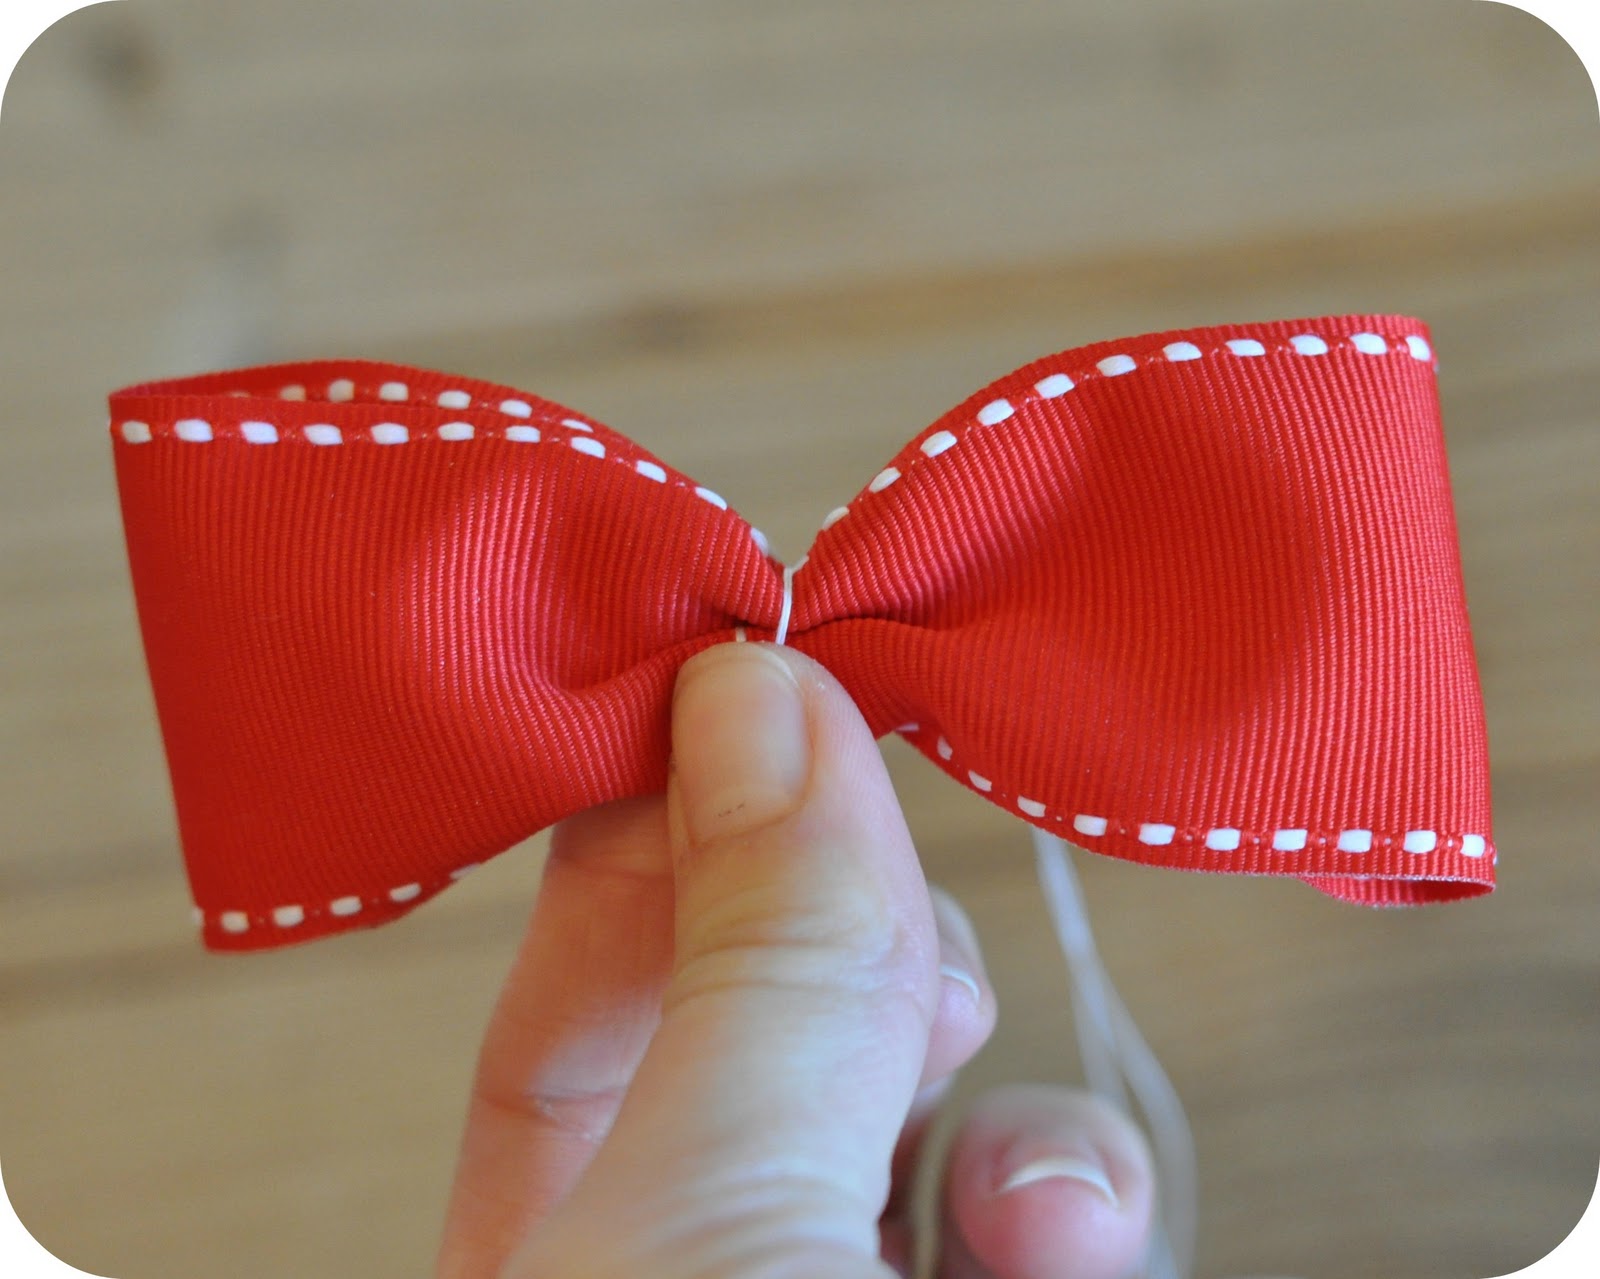
Pull thread tightly while pinching an accordion style crease in the center of your bow.

Bring your needle through the center of the bow several times and then cut the threads and tie off in a knot to hold center of bow in place.

Measure your accent ribbon around the center of your bow to decide how much you will need. Trim and finish edges using your lighter or heat sealing device.

Using your hot glue gun, glue one edge of your accent ribbon to the back of the center of the bow.

Bring the accent ribbon around and adhere the other edge to the back of the center of you bow using your hot glue gun.

Attach your hair clip using your hot glue gun. If your hair clip has open prongs, you will need to place a piece of folded wax paper in between the prongs to prevent the clip from sticking together.

And try it on...nothing is more fun than an adult with a bow in their hair...or just wait for your little nut to get home from school and put it in her hair.
I hope you all are enjoying these tutorials.
If you ever have a specific tutorial or bow you would like to see, please feel free to comment or email me at deepsouthsweets@gmail.com. You can also visit Deep South Sweets on Facebook or follow me on Pinterest!
Original Tutorial found at The Ribbon Retreat

No comments:
Post a Comment